服务器配置 pytorch 环境
- 2 分钟前在服务器虚拟机上无法使用 GPU 资源,运维说可能是 pass through 的透传问题,一周多时间并没有什么好的解决方案,但物理机上可用,故在物理机中配置 pytorch 环境。系统为 Centos8
物理机安装Nvidia GPU驱动
(1) 更新kernel版本
yum install kernel
yum install kernel-devel
(2) 安装gcc和gcc++
yum -y install gcc gcc-c++
(3) 重启
reboot
(4) 禁用默认带有的nouveau
vim /usr/lib/modprobe.d/dist-blacklist.conf
注释 nvidiafb一行
在文件最后添加
blacklist nouveau

options nouveau modeset=0
编辑 /etc/default/grub
vim /etc/default/grub
将 rd.driver.blacklist=nouveau nouveau.modeset=0 添加到GRUB_CMDLINE_LINUX
# 之前
GRUB_CMDLINE_LINUX="crashkernel=auto rd.lvm.lv=centos/root rd.lvm.lv=centos/swap rhgb quiet"

# 添加完后
GRUB_CMDLINE_LINUX="crashkernel=auto rd.lvm.lv=centos/root rd.lvm.lv=centos/swap rhgb quiet rd.driver.blacklist=nouveau nouveau.modeset=0"
让配置生效
grub2-mkconfig -o /boot/grub2/grub.cfg

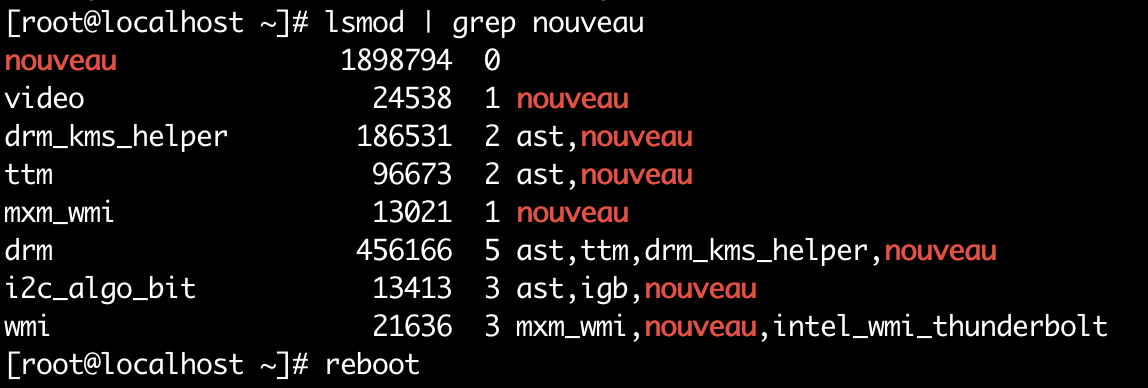
此时使用 lsmod | grep nouveau 查看 nouveau 是有东西的说明还没被禁用

reboot # 重启
(5) 重建initramfs image
mv /boot/initramfs-$(uname -r).img /boot/initramfs-$(uname -r).img.bak
dracut /boot/initramfs-$(uname -r).img $(uname -r)
(6) 修改运行级别
systemctl set-default multi-user.target

(7) 重启
reboot
(8) 查看nouveau是否已经禁用
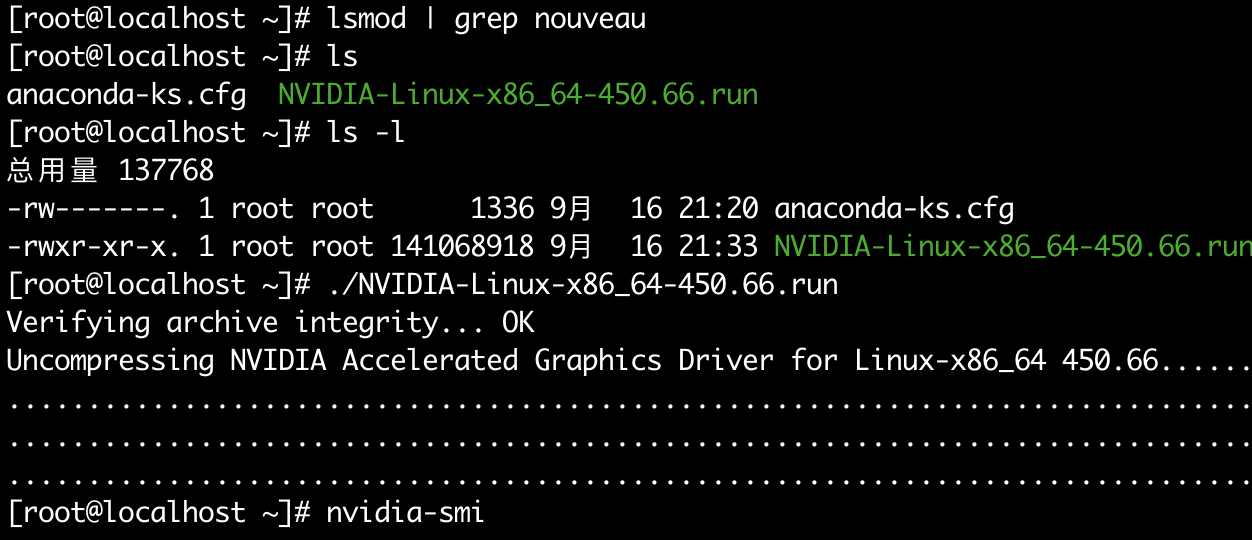
lsmod | grep nouveau
如果没有显示相关的内容,说明已禁用

(9) 安装显卡驱动(具体驱动文件,根据具体显卡型号变换)
# cd /root/cDeep/Nvidia/# chmod +x NVIDIA-Linux-x86_64-375.39.run# ./NVIDIA-Linux-x86_64-375.39.run
如果询问是否安装安装32位驱动,选择no
如果提示要修改xorg.conf,选择yes
(10) 重启
# reboot
(11) 查看GPU信息
nvidia-smi

CUDA 安装
sh cuda_10.2.89_440.33.01_linux.run
tar -xvf cudnn-10.2-linux-x64-v7.6.5.32.tgz
第一个选择输入“accept”, 后续只选择 Cuda ToolKit, Then Install

配置环境变量:
vim /etc/profile


# 添加下面两行
export LD_LIBRARY_PATH="$LD_LIBRARY_PATH:/usr/local/cuda/lib64"
export CUDA_HOME=/usr/local/cuda

# 令配置生效
source /etc/profile

# 查看 CUDA 版本
cat /usr/local/cuda/version.txt
CUDA Version 10.2.89
安装 python3 和 pytorch
yum install python3

pip3 install -i https://pypi.tuna.tsinghua.edu.cn/simple torch
检查 pytorch 是否安装成功
vim test_torch.py

# test_torch.py
from __future__ import print_function
import torch
x = torch.rand(5, 3)
print(x)

# 运行 test_torch.py, 结果如下图表示 pytorch 安装成功
python3 test_torch.py

vim test_cuda.py

## test_cuda.py

import torch
print(torch.cuda.is_available())

# 运行 test_cuda.py, 输出为 True 表示 CUDA、显卡驱动 安装成功
python3 test_cuda.py


